
Views: 0 Author: Site Editor Publish Time: 2025-06-02 Origin: Site


Updating your bathroom doesn’t always require a full renovation. One of the most cost-effective, stylish, and satisfying ways to transform your bathroom is to repaint your bathroom cabinets. Whether you’re planning to refresh a tired-looking vanity or breathe new life into a dated cabinet with mirror, this comprehensive guide will walk you through every step of how to paint bathroom cabinets like a pro.
We’ll cover everything — from selecting the right tools and paint, to preparing different types of surfaces like aluminum bathroom mirror cabinets or lightweight door cabinets, to reassembling your cabinet with silent hinge. This article also includes tips on choosing the right finish, avoiding common mistakes, and integrating product recommendations from premium suppliers like Fiesono.
Let’s dive into the ultimate DIY painting guide that’s designed to help you increase the aesthetic and functional value of your bathroom cabinets.
Painting bathroom cabinets is a trending home improvement project, especially for homeowners looking to upgrade on a budget.
Here’s why this method is gaining traction:
It’s cost-effective compared to cabinet replacement.
It offers complete control over color and finish.
It complements a wide variety of décor styles.
It increases the resale appeal of your home.
Whether you have a bathroom cabinet over the toilet, a cabinet with double mirror, or a bathroom cabinet with sink, repainting can instantly modernize your space.
Before you start painting, gather all the necessary tools and materials. Different surfaces like bathroom cabinet doors, aluminum bathroom mirror cabinets, and storage bathroom cabinets may require specific primers or techniques.
Basic Tools List (For All Cabinet Types):
| Tool | Purpose |
|---|---|
| Screwdriver | To remove cabinet doors and hardware |
| Painter’s tape | To protect walls and floors |
| Sandpaper (120 and 220 grit) | To smooth surfaces and remove old finish |
| Degreaser or TSP | To clean cabinet surfaces |
| Paintbrush (angled) | For edges and corners |
| Foam roller | For smooth surface application |
| Primer | Essential for adhesion |
| Cabinet-grade paint | Choose semi-gloss or satin finish |
| Drop cloth | To protect flooring |
For specialized cabinets like a multifunction mirror door cabinet or lightweight door cabinet, consider using a bonding primer to enhance paint adhesion, especially on smooth or glossy finishes.
This section outlines a complete walkthrough to ensure a professional-looking finish. Follow these steps carefully for the best results.
Take off all cabinet doors, drawer fronts, and hardware including door handles and hinges. Label each piece to help you reassemble easily. If you're working with a cabinet with silent hinge, inspect the mechanism and set it aside safely.
Use a degreaser or a mix of warm water and mild detergent to thoroughly clean your bathroom cabinet wall, bathroom cabinet floor, and hardware. Any residue can prevent paint from adhering properly.
Use 120-grit sandpaper to scuff up glossy surfaces and remove old finishes. For previously painted or veneered cabinets, sanding is key to avoiding peeling later. Finish with 220 grit for a smoother base.
Tip: When working with an aluminum bathroom mirror cabinet, lightly sand the metallic surface and wipe it down with alcohol to ensure proper bonding.
Use painter’s tape to mask off walls, sinks, mirrors, and countertops. Lay down drop cloths to protect the bathroom cabinet floor and surrounding areas.
Priming is crucial, especially for slick surfaces like storage bathroom cabinet units or bathroom cabinets with sink that endure moisture. Use a stain-blocking primer for wooden cabinets and a bonding primer for metal or laminate cabinets.
Let the primer dry for at least 4–6 hours or as recommended.
Use a foam roller for flat areas and an angled brush for detailed edges and corners. Apply the first coat using light, even strokes. Allow it to dry completely before applying a second coat.
For best results on a cabinet with double mirror or multifunction mirror door cabinet, use thin layers and avoid overloading the brush to prevent drips.
Once the paint is fully cured (wait at least 24–48 hours), reattach the doors, drawers, and hardware. If your cabinet had an outdated handle, consider upgrading to a new style to match your refreshed look.
Check that soft-close features on a cabinet with silent hinge are still functioning properly after reassembly.
Not all bathroom cabinets respond the same way to paint. Some materials require more prep, while others take paint easily and hold up better over time. Below is a quick comparison.
| Cabinet Type | Paintability | Prep Required | Notes |
|---|---|---|---|
| Solid Wood | Excellent | Medium | Sanding essential |
| MDF | Good | High | Avoid oversaturation |
| Laminate | Moderate | High | Use bonding primer |
| Aluminum | Good | Medium | Sand lightly, use metal primer |
| Mirror Cabinet | Moderate | Low | Only frame gets painted |
Fiesono offers several models that are great candidates for repainting:
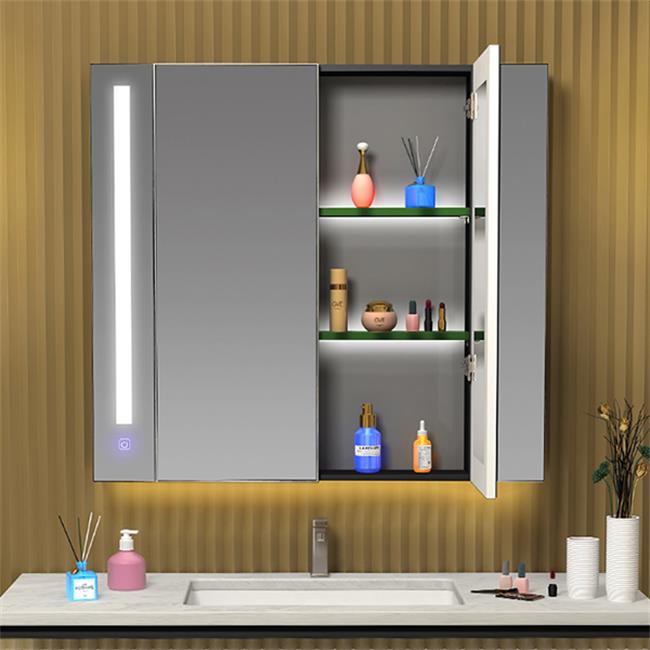
Aluminum Bathroom Mirror Cabinet
Cabinet with Silent Hinge
Lightweight Door Cabinet
Multifunction Mirror Door Cabinet
These cabinets are designed with durable materials, smooth surfaces, and easy-to-remove parts, making them ideal for DIY painting projects.
If you're working with a bathroom cabinet small or a bathroom cabinet over the toilet, space constraints can be a challenge. Here are a few tips:
Use a compact foam roller for tight areas.
Break the project into smaller parts to avoid mess.
Choose lighter colors to make the space appear larger.
Consider wall-mounting temporary shelves to keep items accessible during the project.
Selecting the right paint finish is crucial for longevity and appearance. Here’s how different finishes perform:
| Finish | Durability | Shine | Best For |
|---|---|---|---|
| Matte | Low | None | Not recommended |
| Satin | Medium | Soft Sheen | General-use cabinets |
| Semi-Gloss | High | Noticeable Shine | High-moisture areas |
| Gloss | Very High | High Shine | Accent pieces only |
For bathroom cabinet with mirror or cabinet with double mirror, semi-gloss offers the best balance between water resistance and aesthetic appeal.
Even experienced DIYers make these common errors:
Skipping the primer step
Painting over dirty or oily surfaces
Using the wrong type of paint
Not allowing enough drying time between coats
Reinstalling doors before paint is fully cured
Avoid these missteps to ensure your painted bathroom cabinet wall and drawers stay flawless longer.
Modern bathroom design favors clean lines, neutral colors, and matte textures. Trending color palettes for 2024 include:
Greige (gray + beige)
Navy blue with gold hardware
Matte black for contrast
Soft sage green for spa-inspired spaces
Adding a fresh coat of paint to your storage bathroom cabinet or bathroom cabinet with sink is a great way to tap into these trends without a full renovation.
Fiesono offers a wide range of bathroom cabinets suitable for repainting and customization:
Aluminum Bathroom Mirror Cabinet
Lightweight, rust-resistant, and durable — perfect for painted finishes.
Multifunction Mirror Door Cabinet
Offers storage space and high aesthetic value; takes paint well on framing areas.
Cabinet with Silent Hinge
Ideal for homeowners who want a functional, quiet closing system in their newly painted setup.
Lightweight Door Cabinet
Easy to disassemble and reassemble, making painting a breeze.
All of these models are designed with modern living in mind, offering a perfect foundation for personalization through paint.
A1: Yes, but you need to use a high-adhesion bonding primer and sand the surface lightly before applying paint. Laminate is slick and requires more prep for the paint to adhere properly.
A2: Use cabinet-grade enamel or acrylic latex paint with a semi-gloss or satin finish. These finishes resist moisture and are easier to clean, making them ideal for high-humidity bathrooms.
A3: Wait at least 24–48 hours for the paint to fully cure. If you reattach too soon, you risk smudging or peeling the paint.
A4: You can paint the frame or outer body of a bathroom cabinet with mirror, but not the reflective surface itself. Use painter’s tape to protect the mirror during the process.
A5: A stain-blocking primer for wood, and a bonding primer for laminate or metal cabinets. Choose a primer that works with your chosen paint type (latex or oil-based).
A6: Use a foam roller for large flat surfaces and an angled brush only for corners or edges. Apply thin coats and sand lightly between layers for a smooth finish.
A7: Repainting is often more cost-effective and allows for customization. If the structure is still solid, it's generally worth repainting rather than replacing.
Painting your bathroom cabinets is one of the most rewarding and budget-friendly ways to give your space a facelift. Whether you’re working with a bathroom cabinet small, a cabinet with silent hinge, or a bathroom cabinet over the toilet, a few coats of paint can transform it.
With the right tools, a little patience, and quality products like those from Fiesono, your newly painted cabinet will not only enhance the look of your bathroom but also improve its functionality for years to come. So grab your roller, pick your shade, and let your bathroom reflect your personal style.
Ready to start your project? Explore Fiesono’s full collection of customizable bathroom cabinets and hardware options that are perfect for painting and personalization.


